Using and creating tables
With Clean Size Charts, creating and editing tables is simple. No need to start from scratch—just click on any cell in the preset table and customize it to suit your needs.
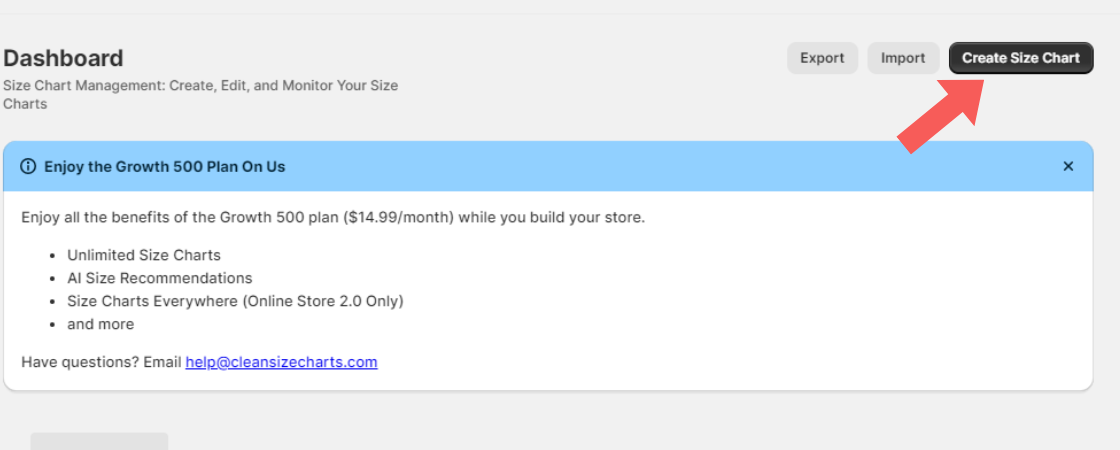
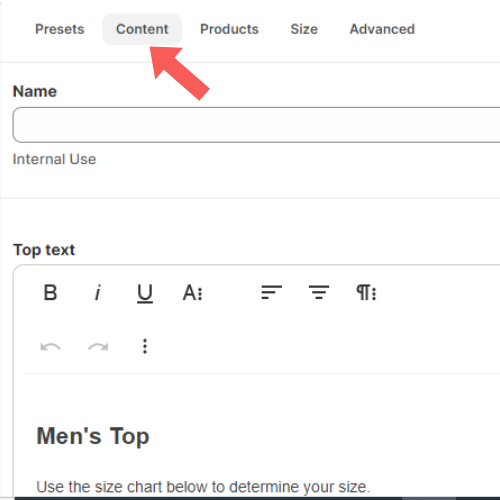
Create Your Table on Clean Size Charts App
- Visit the Dashboard and select Create Size Chart.
- Select Content.
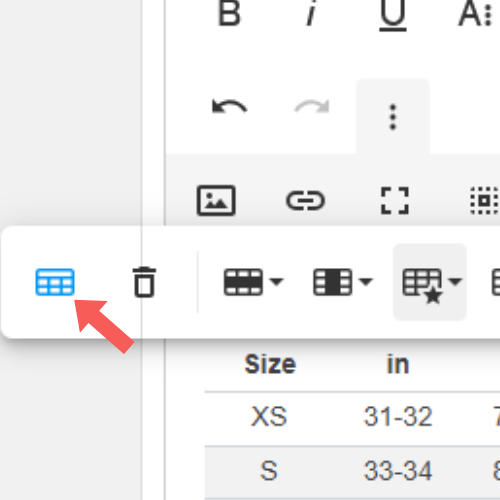
- Navigate to Table.

- Select any cell to configure.
Configure a Table
The Table section is flexible and has features for easy configuration and customization.
Set a Table Header
You can set a header on a table preset.
- On the Table tab, select a cell and select the Table Header icon.
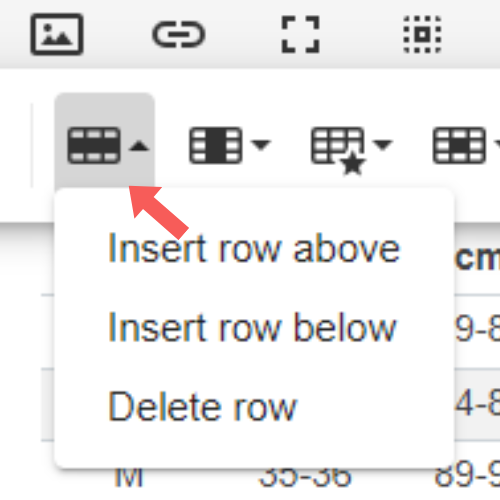
Insert a Row in a Preset Table
- Select the cell around which you want to insert a row.
- From the options, select the Row icon.
- Insert the new row above or below the cell.
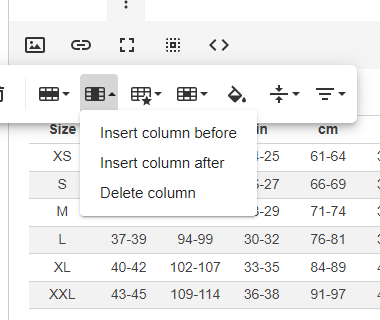
Insert a Column in a Preset Table
- Select the cell around which you want to insert a column.
- From the options, select the Column icon.
- Insert the new column above or below the cell.
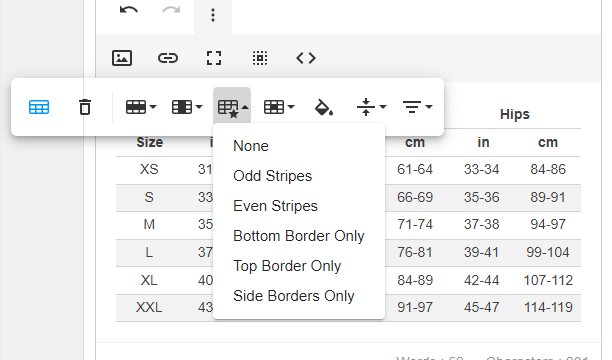
Style Your Table
There are various options to style your table.
- On the Table tag, hover on the Style icon.
- Select any of the options to customize and style your table.
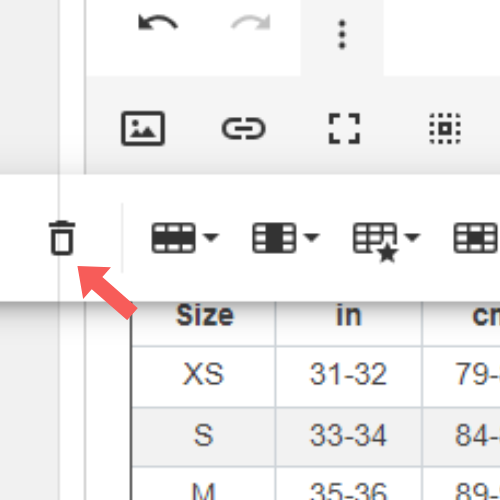
Delete the Entire Table
- Select any cell.
- Select the Remove Table icon to delete the entire table.
Delete an Entire Row
When editing a preset table, you may want to delete an entire row.
- Select a cell on the row you wish to delete.
- Select the Row icon.
- Select Delete Row.
Delete an Entire Column
- Select a cell on the row you wish to delete.
- Select the Column icon.
- Select Delete Column.
Save Changes Made to the Table
You may want to save changes during or after customization process. It’s easy.
- Navigate to the top corner of your dashboard and select Save Changes.

Tip: To discard a newly made change, select Discard.
Change a Cell’s Color
- Select the cell you wish to change its color.
- Select the Cell Background icon.
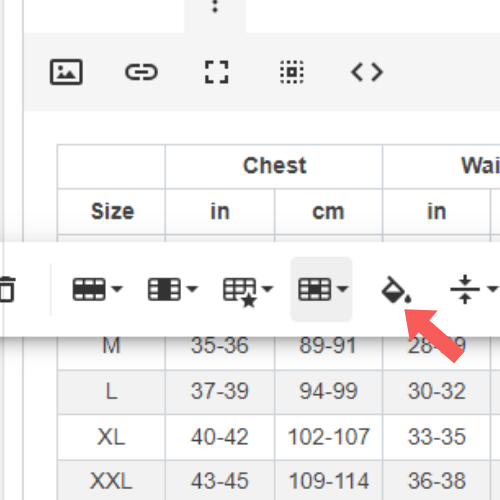
- Select the color you want from the color palate or input the HEX code.
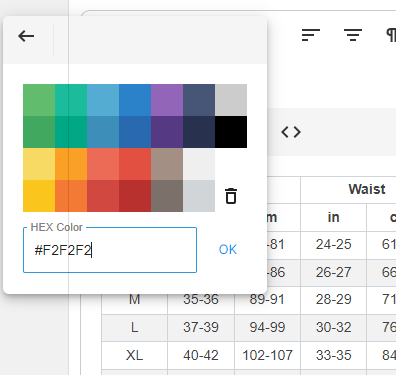
- Select OK.
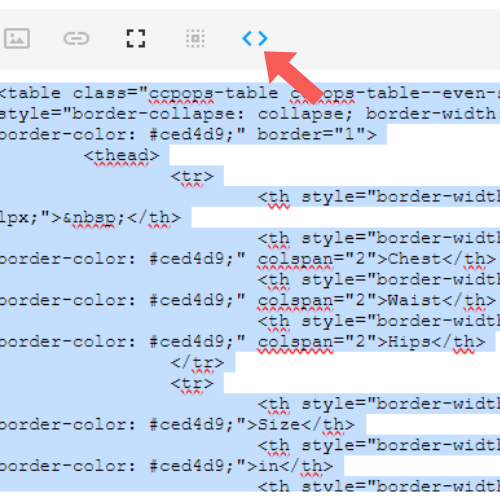
Copy Table Code
You may want to embed your Size Charts table in your website or other platforms. To do so, you must copy the table’s code.
- Select the Code View icon.
- Select the entire code and copy it.
- Paste the code in your desired platform or space.
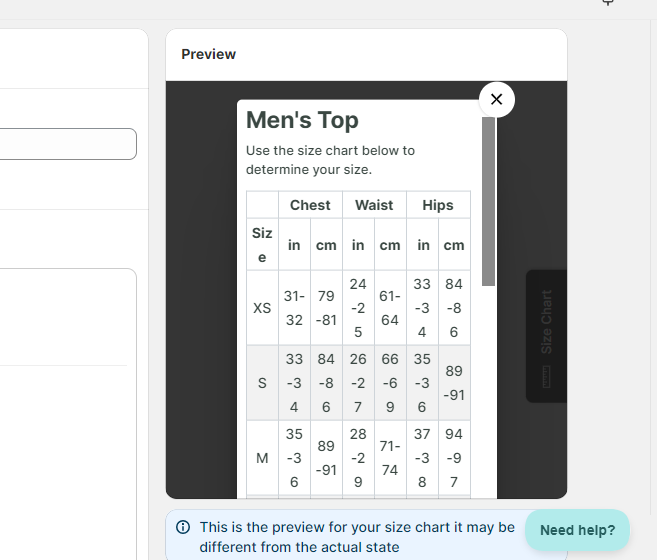
Preview Your Table
To review your table after customization,
- Navigate to the top of the dashboard.
- At the top right corner, you will see a separate tab to Preview all changes to your content.